Showing posts with label Punch - Banner. Show all posts

Saturday, May 7, 2016

ESAD Blog Hop - Time to Say Goodbye

Welcome to another ESAD Blog Hop.  Want to learn more about ESAD, check out the details at the end of my post. This is a mixed time of the year as we say goodbye with sadness to many of our much loved products from the Annual and Occasions Catalogues.  But the exiting thing is that we get a whole new catalogue shortly and all of the new wonderful products (and I can attest that there are sooooo many).  

This blog hop gives as the opportunity to showcase some of the retinging products one last time, and all I can advise, is that if you love them don't hesitate to order them as they will be gone by the end of the month.

On to my projects - I decided to make a set of four little 3" square cards using a range of retiring products.  I love little cards to add to a gift, or just to leave in a lunch box, or pop onto someone's desk at work. There are so many opportunities to make someone smile in their day. 

 The first card makes use of the Banner Punch and the Honeycomb Hello stamp set. I decorated the envelope with matching little banners.

My second card uses another of the sentiments from Honeycomb Hello and the balloons from Pretty Thankful. I added strips of Everyday Chic Designer Washi Tape, you could really change the feel of the card by using different Washi Tape.

 While I had my Pretty Thankful stamp set out I decided to use the images on my next two cards.  This first one has a combination of Blackberry Bliss and Lost Lagoon, two colours that I am really going to miss.

My final card, also using Pretty Thankful, uses the remaining retiring in-colours, Tangelo Twist, Mossy Meadow and Hello Honey.  I thought I would give you a tip on how to line the sentiments up in these shapes, a tip that would work on other shapes and stamps also.

Firstly stamp the frame and then lie the photo polymer sentiments exactly where you want them in the frame.  

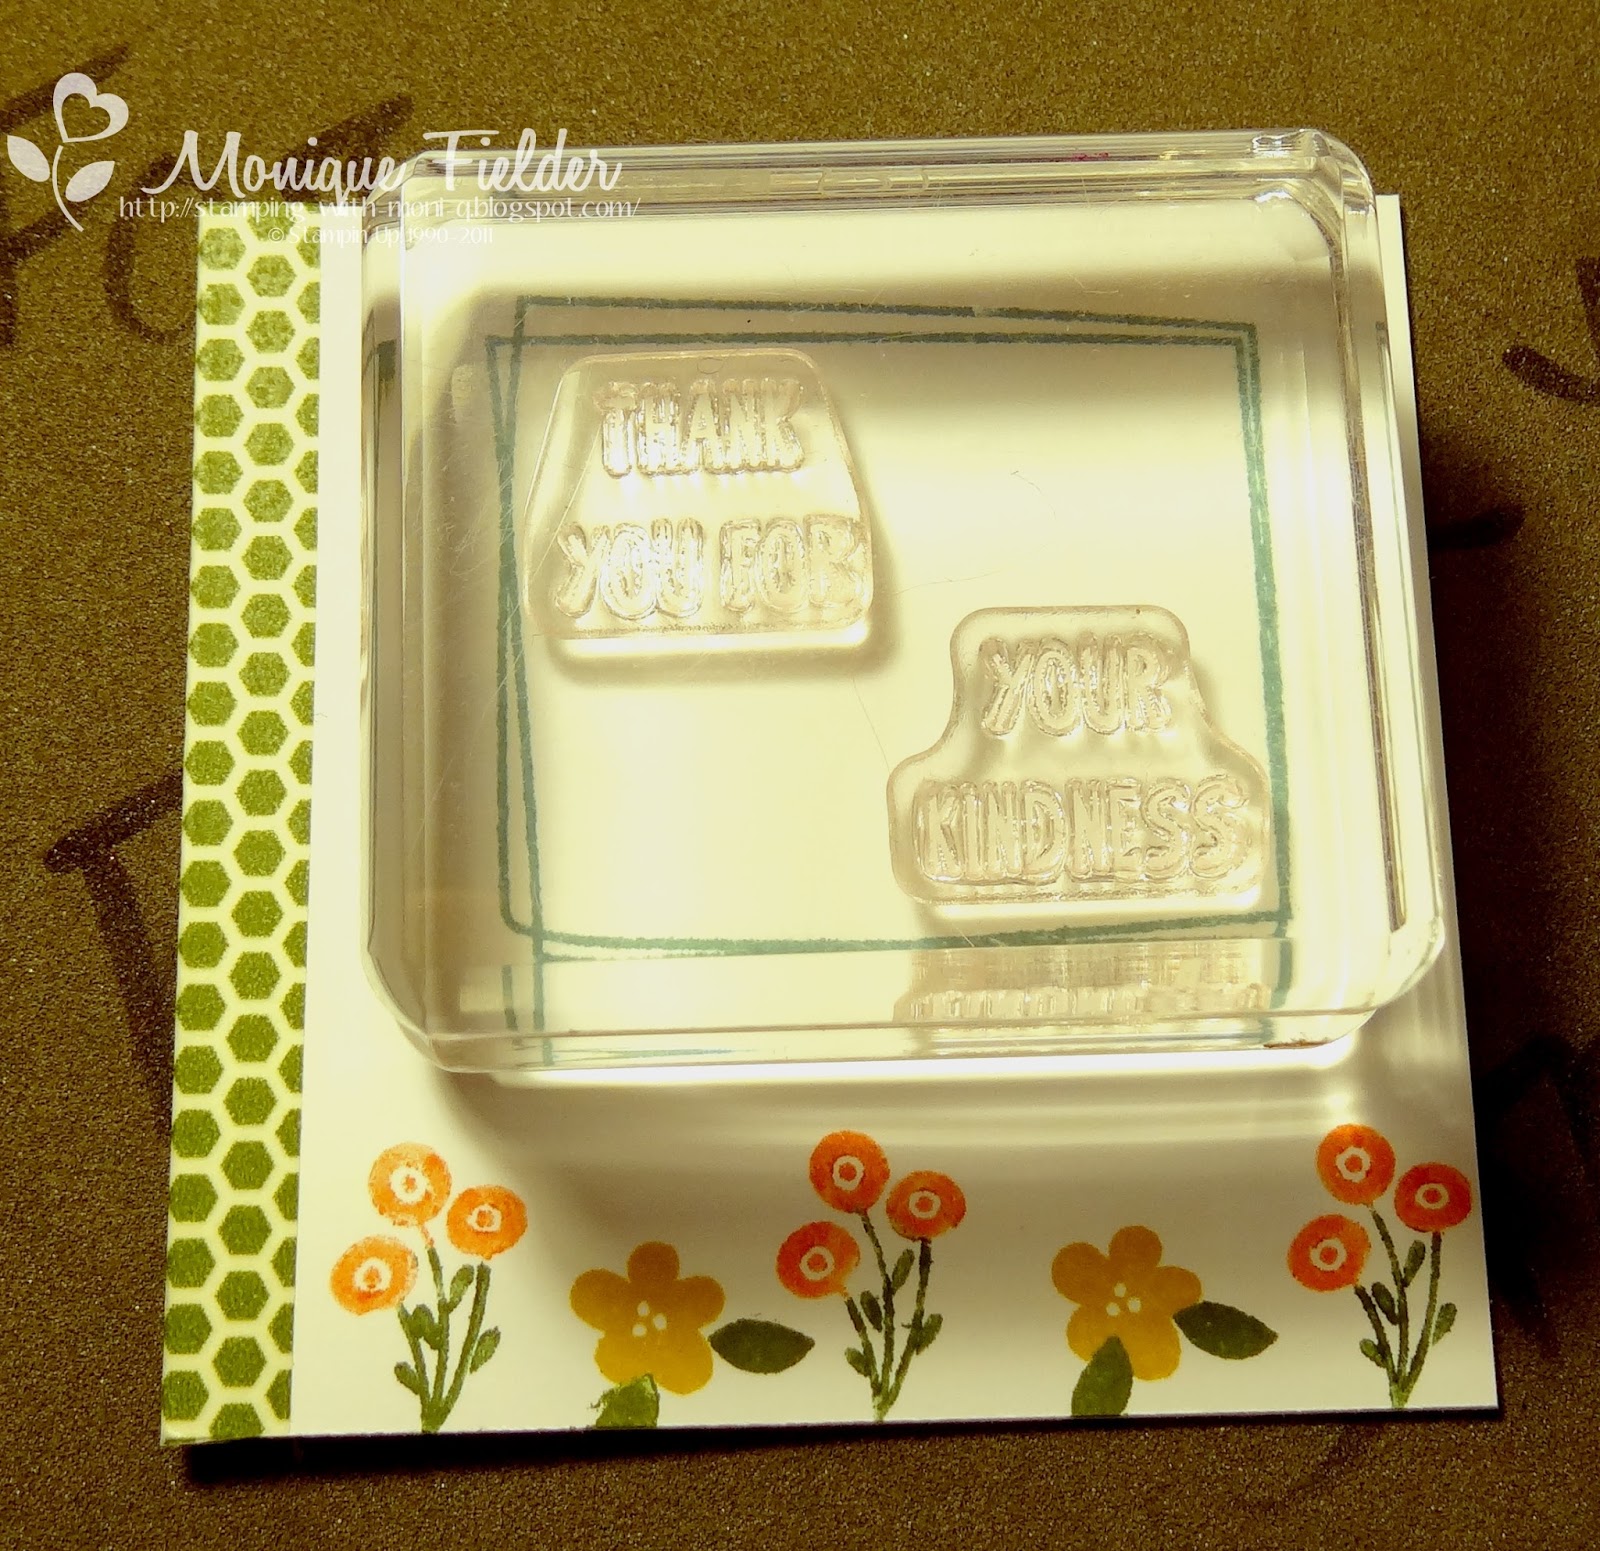
The next step is to lie a clear block over the stamps, the stamps are then perfectly lined up with each other and you only need to ink up once. It is pretty simple but has really been helpful to me when trying to line up multiple photo polymer stamps.

It is time to hop on over to Lou's blog and see what she has created.


Happy Stamping
Monique

Tuesday, March 25, 2014

Birthday Gift and Card

My husband's sister and her husband have birthdays very close to each other in March, and I find both of them a bit difficult to buy for each year.  This year my hubby suggested that we get them the BBC series Sherlock on DVD, which I thought was a great idea.  Now, just giving a DVD is a bit boring, and as a paper crafter you know I just had to dress it up just a 'little'.

I decided to make a cover for the DVD, and include on the inside some microwave popcorn to add a 'movie' experience feel to the gift. I also wanted to design something that was neither masculine or feminine as it would be a joint present for both of them.  Here you can see the front cover on which I have used Gorgeous Grunge (gosh I hope this doesn't retire this year!) stamped in Rich Razzleberry, Island Indigo and Smokey Slate.  Take note of the Just Sayin' stamp on the cover, I cut this by hand and then layered it over Silver Glimmer Paper, adding some Silver Glimmer Paper punched with the Chevron Punch to the card front.

I used the Tag Topper Punch to make a clasp to hold the cover in place, adding a small magnet to both this and the DVD pocket.  The Razzleberry Candy Dot finishes off the clasp.

I made a cute little banner with the Banner Punch and the stamp set "ABC - 123 Sketch Alphabet & Numbers".  This is a great set that I overlooked for some time but it fits perfectly in not only the banner punch but a number of our other punches as well.   After adhering the banners to the front of the card I put a small rhinestone between each to give some bling.  I also added a cute little paper clip from the Essentials Hardware Clips.  The photo doesn't pick up the sparkle, but in person it really was quite blingy.

This is the inside of the 'card', you can see I made a couple of pockets on the back of the cover to hold the two mini popcorn packets, adding Chevrons in Glimmer Paper to these to tie in the theme from the front.  I just loved the expression on Benedict's face and decided to add a speech bubble with their age!  The panel is for writing the message.

I took some measurements and plan to write up a short tutorial for this, it is a bit bigger because the DVD set is of all three seasons, but the idea would work for normal sized DVDs or even a clear mount stamp set, you could add an ink pad and some embellishments to the pockets instead of popcorn.

The good news is they both loved the gift!

Happy Stamping

Friday, January 24, 2014

ESAD SAB Blog Hop - Banner Punch


It's that exciting time of year again, Sale-A-Bration (SAB) is about to begin! For those new to SAB it is a wonderful time of year when you can earn beautiful Stampin' Up! products for FREE!  In Australia just spend $90 on anything from the main or occasional catalogue and you can chose something from the range of SAB products.  To get you in the spirit the Extra Special Australasian Demonstrators have made some great creations with the free items.  You may have hopped on over from Little Scraps of Paper and Delys's lovely creations, or you might be starting here - it doesn't matter, just follow the links at the bottom of each post until you have hopped around all of the blogs!

Now onto my creations ... I chose to showcase the cute little Banner Punch. I love a product that has more than one use and so I got to work looking at alternative uses for this cute little punch. 

Firstly I wanted to use it in a fairly traditional way, by making three little flags down the side of the sentiment panel. This is great if you have a bit of spare space on a card.  The background DSP, Sweet Sorbet, is also from the SAB free products and is so pretty, matching with the 2013-2015 In-colours. 

This next card I have used the Banner Punch to make longer flags for my sentiments, to do this cut strips of cardstock 1.5cm wide and insert one end into the punch, line up and then punch.  By stamping the sentiments first you can get the length of the banner just right.

The little flowers are punched from Sweet Sorbet DSP using the Petite Petals punch, which is a sneak peek from the new Occasions Catalogue also going live on 28th January.

Finally I have used the Banner Punch to make a faux banner on the front of this card.  By cutting a strip of card stock 1.5cm wide, adding a sentiment, then laying it over two banners punched from the same colour cardstock it provides some added interest to the front of a card.  I used dimensionals to pop it up slightly to add to the effect. In this card I have also used the Banner Blast stamp set to create a border along the top and bottom edges of the card, I stamped using the flat edge of the banner alternating two of the patterns.  The DSP on this card is also from Sweet Sorbet, this paper has such a lot of different looks and you will get lots of use out of it.  The centre butterfly and sentiment banner are stamped on Brushed Gold.

Thanks for stopping by, I hope you have enjoyed my creations. Now it is time to hop on over to the next blog:

If you get lost along the way there is a full list of all the blogs at the bottom of this post, don't forget we all love it when you leave comments to let us know what you think of the things we have created - happy hopping!


What is ESAD?

 ESAD stands for "Extra Special Australasian Demonstrators" and it is an on-line group just for Australian and New Zealand Stampin' Up! demonstrators. We so love what we do and not only do we love to share it with our customers, friends, and wonderful blog visitors, but we share our love for what we do with each other as demonstrators. We run swaps, challenges, tutorials, product know-how, and cyberstamps, and we are always there to help and support each other when it is needed. So if you are a Stampin' Up! demonstrator located in Australia or New Zealand, then please feel free to contact me for an invitation to this wonderful group.


Narelle Hoggard
Kathryn Ruddick
Nikki Sadler
Emily Campbell
Keryn Campbell
Leonie Schroder
Chloe Evans
Amity Knight 
Alisha Watson
Ann Gerlach
Delys Cram
ME - Monique Fielder
Andrea Buckland
Paula Reid
Pauline Bennetts
Dianne Dunk
Tamsin Adams
Corina Beyer
Richelle Fletcher
Mel Sharp
Christie Kunkel
Nerida Carter
Gail Kirby
Michelle Grech
Sally Williams

Happy Stamping

Sunday, January 12, 2014

Mashed Up Sneak Peek

It's Friday Mashup time again - this time the challenge was to create a birthday card and/or use twine on your card.  I chose the mashed up option and used twine on a birthday card.  Being a Stampin' Up! Demonstrator gives me the opportunity to pre-order new items, usually a month before they are available. It is currently an exciting time in the Stampin' Up! world - we are about to have Sale-A-Bration, where you can earn free products with purchases of $90, and this year at the same time the new Occasions Catalogue goes live!

Apart from cardstock this card has all new items on it - a mix of SAB and Occasions ones.  The Decorative Dots Embossing Folder was used on the So Saffron over layer, I love the gentle, random texture of this folder. 

Next is a combination of a cute stamp set called Just Sayin' a selection of speech bubbles that wonderfully come with a matching set of Word Bubbles Framelits. To get the layers just right I first used the framelit on the top layer getting the speech bubble where I wanted it.  Then I placed this over the base card (without sticking down) and used a pencil to trace the outline of the shape.  Once the top layer was lifted off I used my Stamp-A-Ma-Jig to get the stamp exactly where I wanted it, on this occasion I used Versamark and Gold embossing powder.  Erase the light pencil line and adhere the top layer with dimensionals.  I plan to complete the inside with another speech bubble with the person's age in it once I have a recipient!

Rather than try and describe how I made the flags, I thought I would take a picture. I grabbed a scrap of Whisper White cardstock and used the new Retro Fresh Washi Tape to cover it then used the SAB Banner Punch to punch out my little flags using different parts of the Washi Tape.  This is a great way to have flags that are different but also match a theme, and I didn't use much Washi Tape either. The Banner Punch also has a cute set of matching stamps that you can also earn for free.

The final new product is the very cute Gold Baker's Twine - this is so lovely in person, it has a thin thread of very shiny gold through it.  It also comes in Silver and both are just wonderful and I can see me using them a lot in the future.

Happy Stamping