Showing posts with label 3D. Show all posts

Tuesday, November 28, 2017

Christmas Decorations

I have been off work for the last few days with a sinus infection and asthma, so not much energy for doing strenuous things.  While it was worse I didn't even feel like crafting, just lots of time in bed flicking through Facebook and Pinterest.  Well good news is I am improving and my creativity has come back in small windows, so I had the chance to make a couple of the projects I pinned.

The first is this lovely wreath which is quite large and a little fiddly, but only until you get the hang of the cones.  I followed the instructions from Amanda at Scrimping Mommy. Her video is very clear and easy to follow, and I just love her accent and giggle!  I totally love how this turned out and it really is quite sturdy despite it only being done with the thinner specialty DSP.  I probably would be a bit more careful about placement of the cones so that I had an even number on the inside ring but think I "hid" the double black together by making it a feature at the bottom!  

My next project was these cute little ornaments, they are simply stunning and look really complicated but in truth are quite simple.  I followed this video from Carrie Rhodes, and used the Merry Music Specialty DSP which was easy to work with and just stunning as a final project.  I finished mine off with some rhinestones, silvery doily on which I mounted a basic black circle and snowflake cut with silver glimmer paper. 

I wanted it to be all symmetrical so planned the layout of my strips with each "side" using 4 dark strips for the main cross pieces and 4 of the lighter pieces.  Be mindful of which you want to show up on the finished star. I found that my second side I folded in the opposite direction (once you watch the video it will make more sense) as you turn it over on the finished ornament, so it was necessary to do this to ensure all the cross bars the same looking from the front.  Just have a play around and see how you go.

I had a little bit of time after dinner and it occurred to me that a "wooden" ornament could be lovely too. So I grabbed a piece of my Wood Textures DSP Stack and got to work. I chose one of the mid-tone shades, and again was careful about how I layered out the pieces so that most of the dark shades were at the front.  When thinking about how to finish off this one I decided ot play around with the Foil Snowflakes, flipping one over and using the Ivory Blends pen all over and highlighting parts of the ornament with the Bronze Blends pen.  I was so pleased with this look, in real life it really does give it a laser wood cut look.  I added some Pearls coloured with the Bronze Blends pen to the tips of the ornament, and a larger one (now retired) in the centre.  The Jute Twine from the Holiday Catalogue finishes off this more rustic look.  

Happy Stamping
Monique

Sunday, September 11, 2016

CTC #95 - Favourite Holiday 3D


I was inspired by this cute trio of boxes this week, you can find them on page 12 of the Holiday Catalogue.


I just made one box and decided to decorate it by stamping images from the Reason for the Season stamp set, and Tin of Tags for the tag. 

Here is a better image of the side of the box.  I am loving the trio of twine used together like this.  I added  a layer of the gold satin ribbon to help it pop.

Inspired to join in this week?  Just use the link above to go to this month's challenge page and follow the linkie.

Time to hop on over to see what Kathryn was inpsired to create this week:
  
Happy Stamping
Monique

Sunday, September 4, 2016

ESAD Blog Hop: Holiday Catalogue

Welcome to the ESAD Holiday Catalogue Blog Hop. Who doesn't love a new catalogue full of brand new products and chocked full of ideas? Well the new Holiday Catalogue from Stampin' Up! does not disappoint!  This blog hop from the ESAD demonstrators will give you just a small taste of what is in store. Whether you have arrived from Delys's blog, or are starting here, just follow the links at the bottom of each post until you get back to where you started from.

One of my favourite bundles from the new Holiday Catalogue wasn't one of the many Christmas or Halloween sets, but the gorgeous Paisleys & Posies stamp set and matching framelits found on page 47. There are two other products from the catalogue that I have featured today, the divine Copper Foil Sheets also on page 47 (my favourite page in the catty!); and the very cute, but easy to miss White Gift Boxes on page 7. 

A friend made me something similar to this a couple of Christmases ago and I knew it would be really cute with these lovely White Gift Boxes. They are a great size at 3" x 3" perfect for any number of treats, and what a great way to show them off but on a lovely matching stand. 


Here is the stand just on it's own and you can see how the box neatly fits in the cut out section, it isn't adhered to the base, so the person can easily access the box without damaging the overall effect.  The base is a piece of 14.8cm x 10.5cm card stock with a fold down the middle at 7.4cm.  Fold the card in half then cut out the recess as follows: 2.5cm from the end, 4cm deep and 8cm wide. I then just added layers of card stock using a pencil to mark where to cut to give me the borders I wanted. I probably could have measured it but I make too many mistakes that way!!

Now for a closer look at the box, remember how I said it was "white", the wonderful thing about that is that you can decorate it anyway you like, whether with stamped images like I have, or with washi tape, brayering, embossing ... the options are limited only by your imagination. With the box and the base I layered some of the different stamps in the set to get the different colours in each image. One of the great things about these little boxes is that they come with a plastic sleeve, so decorating them like this with ribbon and a tag is so easy, and it allows the sleeve to slide off without disturbing any of the decorations!

Here is a close up of the tag, I used a couple of the framelits in the set to create this, layering Crushed Curry, Copper and Bermuda Bay as my base layers, slightly off-set, then one of the more intricate framelits on the top cut once in Copper and once in Crushed Curry, which I used the "off cut" pieces to layer in the Copper layer. Notice how the Bermuda Bay peeks through? I decided to do it this way rather than try and piece those little bits in place!

       
Time to hop on over and see what the talented Richelle has created.


Happy Stamping
Monique

Sunday, August 21, 2016

Perfectly Wrapped Project Kit Tip

I have been having fun today making up one of each of the boxes from the Perfectly Wrapped Project Kit. You can see the full kit made up in the picture above.


I was a little disappointed to learn that the frill on the smallest box was adhered directly onto the box and would be torn when the box was opened. I knew there had to be a way to keep the look of the box and frill without having to damage it when the box is opened.

I decided the simplest way would be to add the frill to a belly band in matching Mint Macaron that could be easily slipped on and off without damage.  I cut a strip of the long side of an A4 sheet that was just under 1.5cm (I actually think 1.3 would work a little better).  I added four strips of the ruffle by running a very fine strip of Tombow glue down the centre and adhering the first to the card stock, and then layering the others on top.  An additional tip to get the ruffle to work nicely is to slightly off-set each layer.

By adding the fine frill to the belly band it also gives it more strength and reduces the risk of it getting torn accidentally.

I hope this has been a helpful tip for this little box.

Happy Stamping
Monique

Sunday, May 22, 2016

CTC #79 - 3D or Kit


Welcome to another CTC Sunday Blog Hop, can you believe this is our second last hop before we start on the new Annual Catalogue!  For this hop we are taking inspiration from 3D items and Kits from the Annual and Occasions Catalogues.

This is the image I took inspiration from, the little bag/basket on the left from page 61 of the Annual Catalogue, I think this is so cute and such a great way to use the Fry Box die.

I changed mine up slightly, to make it a little more masculine. I used images from the Amazing Birthday stamp set stamped in Cherry Cobbler and Night of Navy which are great masculine colours. To add to the masculine theme I added a Gold Doily rather than the Tea Lace Paper Doilies, as well as some of the edge of the 1-1/4" Burlap Ribbon.

This is a great size little bag, I added some treats in one of the Sketched Dots Tag a Bag Gift Bags. I did think the bag in the catalogue with popcorn would be a really cute way to package up a movie gift voucher for someone.

Now its your turn to get inspired by the projects in the Stampin' Up Catalogues and add your creation to the link above. Just a quick reminder that we have one link for the whole month with a top pick chosen from all the weeks.

Time to head on over to Rebecca's blog and check out her wonderful creation.

I am also adding my project to the Seize the Birthday challenge to add dimension to a birthday project, 

Happy Stamping
Monique

Sunday, May 8, 2016

CTC #77 - Going Places

Welcome to another CTC Sunday Blog Hop, this week we are taking inspiration from the Going Places suite of products.  

Ever since I saw the image above in the Occasions Catalogue I knew I wanted to re-create the picture frame.  I am not sure exactly what about it drew me in but I just loved it.

So this week was the perfect opportunity to make my own using the Going Global stamp set and coordinating Going Places Designer Series Paper   I did make a couple of changes, handwriting the You and Me on the little flags, and red Glimmer Paper hearts punched with the Owl Builder Punch.

I also added an additional layer, stamping the "Love" in Real Red, and the banner Early Espresso on Very Vanilla card stock and fussy cutting the image.  My tip on this is when you fussy cut around a stamped image like this, when you have finished take your Stampin' Write Marker in the matching colour and just run it around the outer edge so there is no fine vanilla like around it.

If you would like to join in create a project taking inspiration from the Going Places Suite page 38 - 49 and add it to the May link page.  Each month the team will choose a top pick from the entries for the month.


Now it is time to hop on over to see what Julia has created.

Happy Stamping
Monique

Sunday, March 27, 2016

CTC 72 - Own Choice Sale-A-Bration

Welcome to another CASEing the Catty Blog Hop, this one is a little sad as it will be our last from the Sale-A-Bration products because SAB finishes on 31st March!  Hasn't that time gone quickly!

I decided to take inspiration from this image on page 13, and combine features from both the card and the bag.  

I loved the little bag so re-created it almost exactly, changing the ribbon.  I did like the effect of the flower and butterfly on the card, stamping onto coloured card stock and then fussy cutting them.  I decided to add these as an element to the tag.  Because I was using Blackberry Bliss for the butterfly I decided to emboss it in gold instead of just stamping.  

I hope my project, and those of the rest of the team, have inspired you to join in for the last of the Sale-A-Bration inspired hops.  If you do follow the link above to the CTC Blog where you can upload your project.

                                
Time to head on over to Tricia's blog and see what she was inspired by.


Happy Stamping
Monique


Sunday, November 29, 2015

CTC 58 - 3D Gift Packaging

Don't you just love gift giving? I love making people's gifts extra special by creating the packaging to go with them, and at this time of year when there are lots of people to give little gifts to Stampin' Up! comes to the rescue with lots of packaging options.

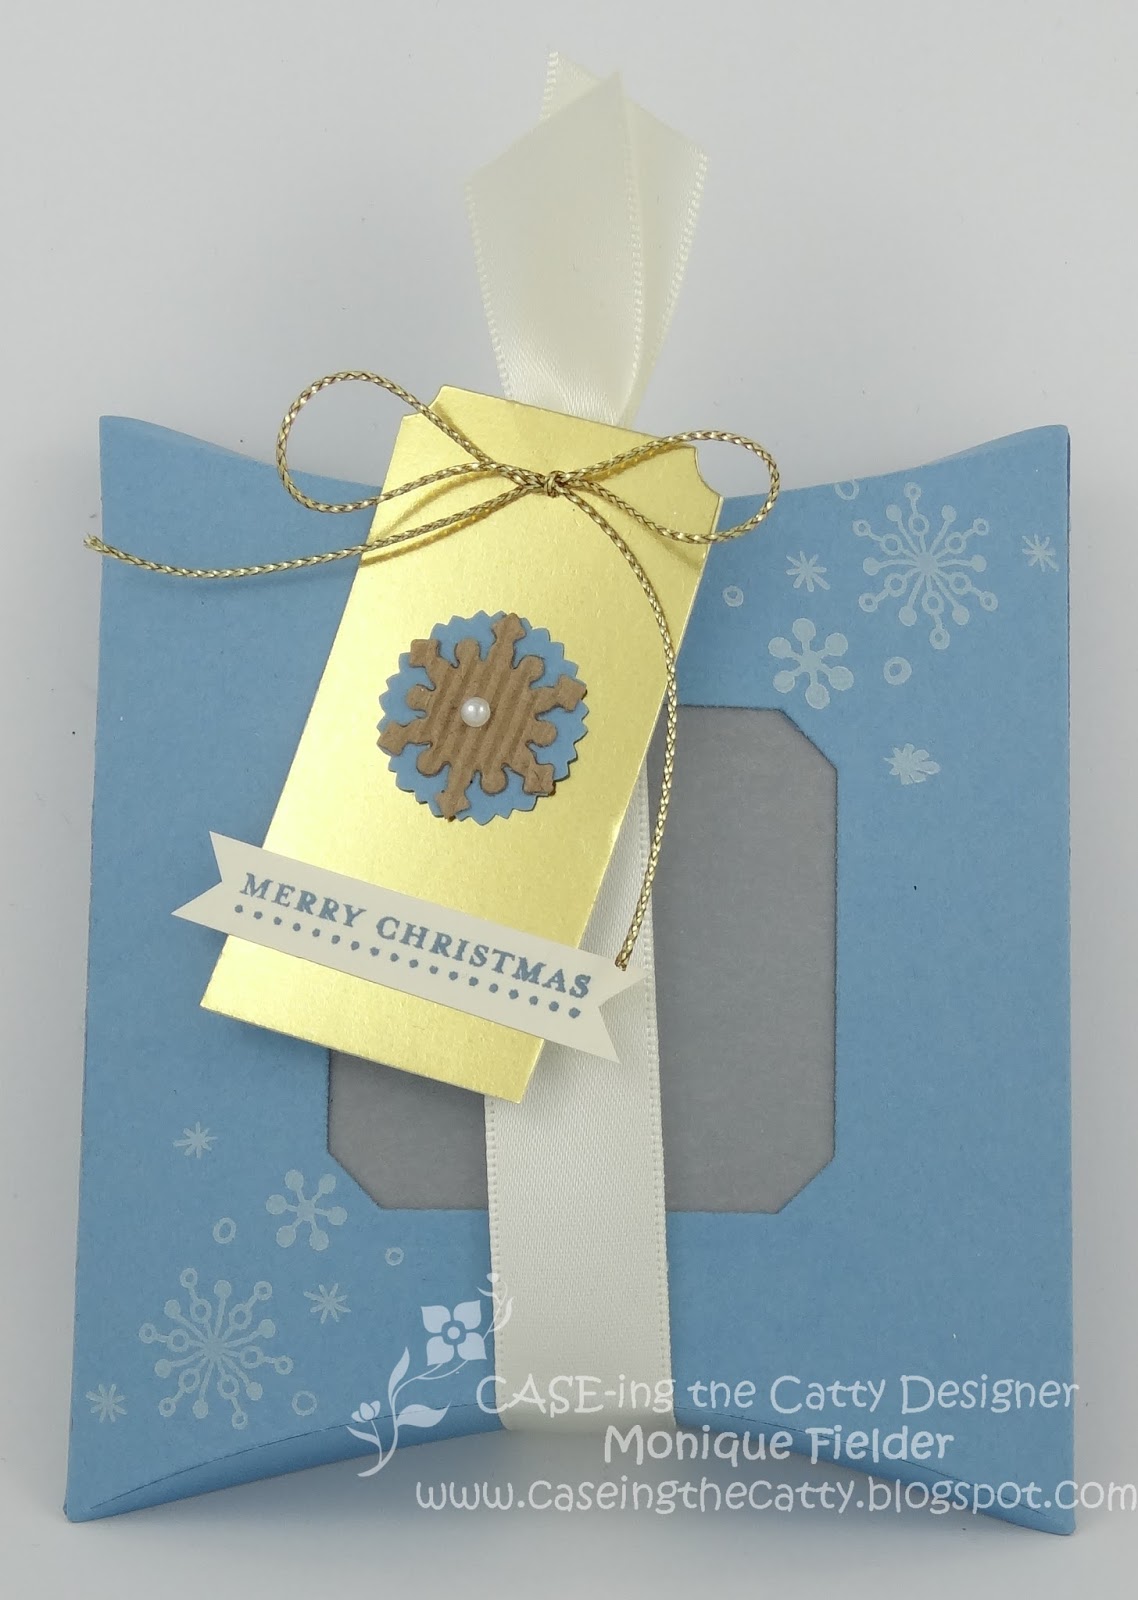
I have used the adorable Square Pillow Box Thin letsFramelits for this little gift, ready to hold a gift card, or sweet treat.  I just love using blues at Christmas and for this I used Marina Mist and stamped it with the snowflakes from Perpetual Birthday, it is just wonderful for this type of small stamping.  I cut out the window using one of the framelits from the set and the tag from the Tags & Labels Framelits, cutting just one edge.  To make the embelishment I punched a Marina Mist 7/8" Scallop Circle and then layered a Kraft Corrugated Paper snowflake, again using one of the many little framelits that come with this set.

Sadly the Square Pillow Box Thinlets is on the Retirement List so if I have inspired you to get one, don't wait too long to order it, they will only be available until 4th January 2016.

I am the last blog on the hop, so if you have been all the way around then hop back to the main blog and if you get inspired to join in add a link to your project in the comments.  Otherwise follow the link to Stasia's blog and check out her project inspired by the Holiday Catalogue. 
Happy Stamping
Monique