Showing posts with label Strength and Hope. Show all posts

Tuesday, August 2, 2011

Fan Fav at the Friday Mash Up ...

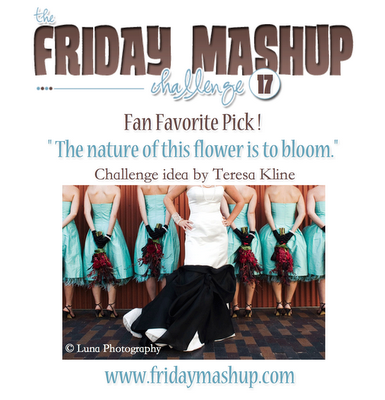
On a weekend full of challenges it would not feel right to skip the Friday Mash Up Challenge, especially this week as it is the first Fan Favourite. A little congratulations to Teresa Kline for her mash up being chosen.

The challenge this week is to ...
  1. Create a "hand made flower or flowers" on your project
  2. Create a project using "turquoise, red and black"
  3. Or Mash It Up and create a project with hand made flowers that uses red, turquoise and black.
My project for this week is a side step card inspired by Marion Benfield who is a fellow Stampin' Up! Demonstrator.  One of the things I love about being a demonstrator is the support and inspiration I get from other demonstrators, it really is a great community.  While her original card is stunning I immediately knew I wanted to CASE it using a side step layout, and super perfect that it has a hand made flower!  I used a Basic Black circle as a background for the flower to make it "pop".

Here is Marion's original card ...
Card by Marion Benfield

Don't forget to pop over to Friday Mash Up and leave some comments for the design team and other creators.  I too love to hear what you think of my creations.

Happy Stamping

Sunday, April 17, 2011

Window Sheets and Watercolour

It seems my Mojo is back, let's hope it hangs around for a while!  Each week I look at a variety of challenges and if the mojo is around will give them a go.  This week two in particular caught my eye:  Less Is More's challenge this week is to use Acetate, and as soon as I saw this I just knew exactly what I wanted to do.  It is a technique that I saw at the Stampin' Up! Regional Training Day last year.  I knew the butterfly from Strength and Hope would be perfect for this, the only decision then was what colour scheme ... over to Colour Q Challenge which this week was to use Kraft (aka Crumb Cake), Cherry Cobbler, Kiwi Kiss (in my case Old Olive as Kiwi Kiss has retired and I used all mine up), Tangerine Tango and White.

I tried to keep the card fairly simple, and to that end have left off a sentiment, sometimes I think it is nice to have an all purpose card. Sometimes on a card like this I will just stamp the sentiment on the inside once I know what I want to use it for.  Now onto how the card was done.

Firstly I got a piece of Water Colour Paper and sprayed it all over both sides until it was quite wet and let the water sink into the paper.  I gently blotted it on some paper towel to remove the extra water so there was no surface water on the paper.  I carefully stamped the image of the butterfly onto the wet paper using Cherry Cobbler, holding the stamp down for about 5-10 seconds to help the ink run a little.  From here you can either let the water colour paper dry naturally, or if you are like me and itching to get on with the card, you can use your heat tool.   If you do use a heat tool make sure you turn the paper over as it dries and dry the back as well as the front so it won't curl up unevenly.  I then spritzed with Champagne Shimmer Mist (Shimmer Paint added to some rubbing alcohol) to make it sparkle.

To give the butterfly definition you then stamp the image onto some acetate or Stampin' Up! Window Sheets, you need to use StazOn ink for that to make the image permanent.  This is held in place at one corner with a brad, allowing it to move on the card.  I had cut the Window Sheet to size and then used my Stamp-A-Ma-Jig (SAMJ) to position the butterfly just where I wanted it.

 Now, I know Less Is More is about clean and simple cards, but I felt that it was just a bit too plain, so thought I would try an additional acetate layer.  For this one I again used StazOn and my SAMJ to position the flourish stamp that comes in the Strength and Hope set into the corners.  I first saw this stamp used as a corner stamp by my friend Leonis Schroder.  I did it on a second layer to test out whether it was "too much" or not though you could do it on the same layer as the butterfly if you were confident!

I hope you like my creation, and are inspired to try this technique out for your self.  You don't have to use a single solid colour for your main stamp, using your Stampin' Write Markers to colour directly onto your stamp gives some stunning effects.

Happy Stamping

Saturday, April 16, 2011

Challenge Time Again - Friday Mashup 2

My lovely upline Kasey, is a guest designer on The Friday Mashup, so I just had to play along, and boy do I think I have out done myself this time.  I looked at the colours and wondered what I could do with them, then decided I should use my Strength and Hope stamp set.  A few days ago I was talking to my stamping friend Vicki who suggested a way of cutting up A4 cardstock to get 6 small gift cards from it, and so wanted to give that a go too, so in the spirit of Mashups ... I made a tiny card (7cm x 7cm).

I love the colours actually, and the size of the card. I stamped the words on the Crumb Cake cardstock as a background and then cut the butterfly and adhered with dimensionals to give it some lift. To add a bit of the blue, I added some beautiful Marina Mist taffeta ribbon. The sentiment is from the Tiny Tags stamp set and I cut it out using the word window cut once, and the cut again to form a smaller window.


There was then no reason not to continue ... so I made 2 more cards! The first one I did some masking, initially covering the centre of the card with a circle of post-it note while stamping the words, then used the other part of the post it to protect the words while I sponged the centre circle and spritzed with Champagne Shimmer Mist, you can just see the shimmer.

This is the next one I made, I wanted to try one without the ribbon and with a bit more layering of cardstock.  Marina Mist is such a beautiful blue colour, I just love it.  You can see that I have tied a piece of Linen Thread around the butterfly and left the ends as the antenna of the butterfly (no matter how hard I try I just can't cut out the stamped ones).  The butterfly is raised on dimensionals.

Now, what is a set of cards without a cute little box to keep them in?  So I made a Pizza Box just the right size (7.5cm x 7.5cm), and decorated it to match the cards.  I wanted to bring out more of the blue so made the box base out of Marina Mist.  The other thing I did with this one was to stamp the butterfly in Cajun Craze straight onto Marina Mist cardstock, and then a little piece of ribbon to finish it off.

By this stage the creativity was really flowing so I decided to make one more card, and my little challenge here was to fit the Friday Mashup sketch onto such a small square card.  What do you think?  I was so pleased with this one, I used a technique Kasey taught me to put the scallop edging around the Hope stamp.  You can check it out HERE.

Here is the whole set, all finished up and ready to go.

Happy Stamping
Saturday, April 9, 2011

Strength & Hope

One of the beautiful new sets in the Autumn/Winter Mini Catalogue is Strength & Hope.  The best thing about this set is thatt it's not just beautiful, but that $2 from the sale of every set sold is being donated to the Brest Cancer Research Foundation. Today I have used all the stamps in the set to make the card I will be entering into two challenges today - Colour Q and Friday Mashup.

The colours in the Colour Q are a bit brighter than I usually put together, so that was definately a challenge for me!  I didn't have Bermuda Bay so I used Tempting Turquoise instead.  The Friday Mashup Challenge is butterflies with dimension, so I used a dimensional to lift my butterfly up off the card.  I have also used my new embossing folder, Elegant Lines to give some texture to the lower half of the card.


Happy Stamping