Showing posts with label Scallop Trim Border Punch. Show all posts

Saturday, December 4, 2010

ESAD Summer Mini Blog Hop

Its time again for another Blog Hop from the lovely and talented ladies at ESAD.  What is ESAD? ESAD stands for Extra Special Australasian Demonstrators and it is an online group just for Australian and New Zealand demonstrators for Stampin’ Up!

We so love what we do and not only do we love to share it with our customers, friends, and wonderful blog visitors but we share our love for what we do with each other as Demonstrators. We run swaps, challenges, tutorials, product know how and cyberstamps and we are always there to help and support each other when its needed. So if you are a Stampin’ Up! Demonstrator located in Australia or New Zealand then please feel free to click here to join our wonderful group.  If you are interested in learning about the great benefits of becoming a demonstrator yourself please contact me gavnmon@internode.on.net

You might have started with my post, or you might have hopped over from looking at the wonderful creations that Kim Conway has over on her blog KC  CARDS.  The beauty of a blog hop is that it doesn't matter where you start you just keep hopping to the next blog by following the link at the bottom or each post.  Don't forget we all love to hear what you think of our creations, so please leave a comment as you hop around.

The new Summer Mini Catalogue is full of a variety of products to tempt you, Trims, Punches, Dies, DSP and of course Stamps.  One of the benefits of being a demonstrator is we get to pre-order from the catalogue so here are some of the things I have created using these great new products.


Firstly I thought I would share a scrapbook page, I haven't done a scrapbook page in about 8 years and have been promising myself I would get back to that side of paper crafting.  I was finally inspired to do one using this picture my mum sent me last week.  Can you spot the three new products I have used?


- Firstly is the Victoria Crochet Trim, this is such a delicate woven lace trim, it has a wonderfully vintage feel about it and is just great to use, on this I have backed it with a strip of Real Red card stock to bring out the colour in the flowers and to highlight the pattern of the lace.  
- Second new product is the "Wonderful Mother" stamp from the Well Scripted stamp set.  For this page I used a marker to stamp technique to just stamp the word Mother, rather than the whole image.  I love the swirly font the stamp set uses.
- Thirdly is the Pinking Hearts Border Punch, don't you just love the delicateness of this border, the tiny hearts sit perfectly in the "v" of the border.  Like the Scallop Trim Border Punch, this one also has a matching corner punch so you can make complete borders for card fronts and scrapbook pages.

Next on the list of creations I wanted to share is a simple but effective Easter card using a great technique for making the cross using the Scallop Trim Border Punch. 

I love this because it shows the versatility of the Stampin' Up! punches.  I saw this technique on another blog and can't for the life of me find the link, so please leave a comment if this is your creation and I will give you credit (or update my post when I find the link).  I have also used the Lattice Embossing Folder from the Summer Mini on this card. Its a great folder that just give a wonderful fine texture to the card.
My final project was inspired by my Secret Sister October gift.  I wanted to recreate the decorated bag and use some of the fun little gold paper bags that I have recently acquired (I think I did an OK job of it). The base of this bag is Basic Gray with a Blushing Bride Top Note, layered with a Very Vanilla Top Note that I pre-stamped with images front the Grunge Rock stamp set and then ran through the Lattice embossing folder.  Grunge Rock is such a fun set, and it goes really well with Extreme Elements. 

I wanted this bag to be have a vintage sort of feel so have topped it off with a Victoria Crochet Trim bow, I wanted to bring out the gold in the bag so secured the bow with one of the stunning Antique Brads from the Idea Book and Catalogue - these two products go so well together! 

The guitar from the Grunge Rock stamp set I have embossed in gold onto Basic Gray.  I showed this to my 15 year old daughter (my official Blingologist) and her comment was "Oh mum, that is sooooooo cute. Can I have it?" - a good sign that I hit the mark I was aiming for.  These would make nice gift bags either full of goodies for a birthday girl, or as treat bags for guests.

I hope you have enjoyed my creations, please hop on over to see what Kerryn Campbell has to tempt you with over on her blog Kerryn's Cards.

Just in case you get lost here are a list of all the demonstrators in the blog hop, just click on their name and you will jump right to thier blog ...
** Monique Fielder **

Saturday, October 23, 2010

ESAD Christmas Blog Hop

I hope you’re ready for another ESAD Christmas Blog Hop!

What is ESAD?
ESAD stands for Extra Special Australasian Demonstrators and it is an online group just for Australian and New Zealand demonstrators for Stampin’ Up! We so love what we do and not only do we love to share it with our customers, friends, and wonderful blog visitors but we share our love for what we do with each other as Demonstrators. We run swaps, challenges, tutorials, product know how and cyberstamps and we are always there to help and support each other when its needed.
So if you are a Stampin’ Up! Demonstrator located in Australia or New Zealand then please feel free to click here to join our wonderful group.

You might be starting here or you might have come from looking at Tanya Bell's lovely creations, the beauty of a blog hop is that it doesn't matter where you start, just follow the links at the end of each post to hop to the next blog along.  All of the ladies on this blog hop have put in a lot of work so if you like what you see please leave a comment to let them know!
Now onto my creations ...  I wanted to do something a little different and that started with the card.  Having just started with Stampin' Up! this year I haven't had any Christmas stamps, so I started looking at my other stamp sets to see what could be made Christmassy and who would have thought Extreme Elements would have caught my eye! 
I used the Fleur de Lis and the Wings stamps to make the wreath and was really happy with the way it came out.  The wonderful new adhesive rhinestones gave it a nice touch of bling and the Organza ribbon tops of the wreath beautifully.

The majority of my creations are actually Christmas Decorations - so I decided to dive into the shed and pull out the Christmas Tree to show them off!  They look so lovely on the tree, I don't want to take them down, but I guess I have to as its just a smidge early for Christmas. 

 These two you might have seen before, these are made with 6-8 punch outs from the Ornament Punch.  The one on the left is punched from DSP from the Simply Scrappin' Kit alternated with Baja Breeze card stock, the one on the left is from the Jolly Holiday DSP.  These can be made with any shape punch as long as it is symmetrical.


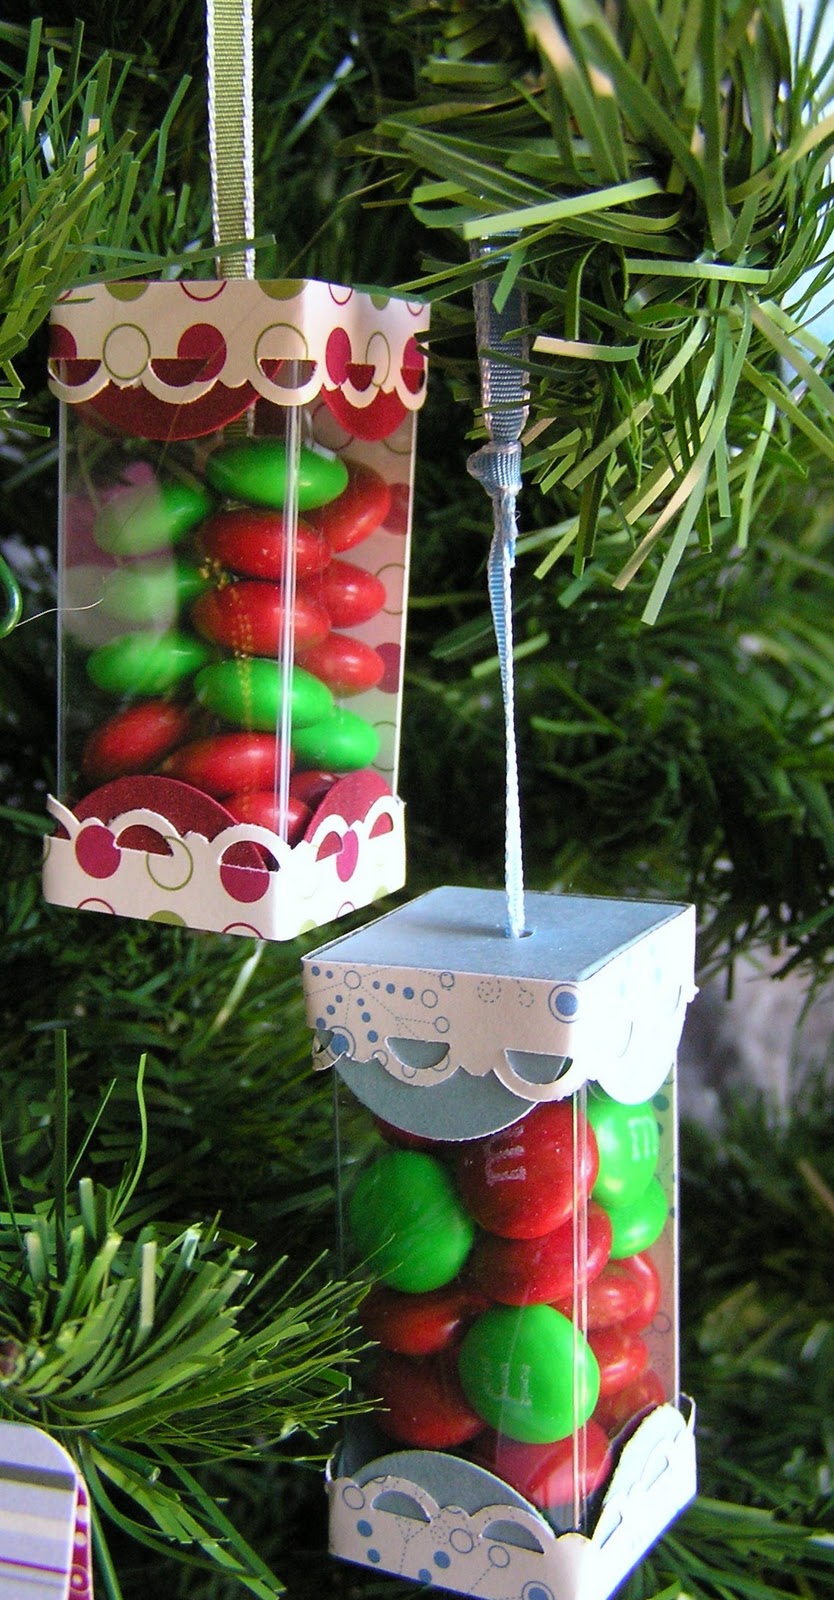
The design for these I developed myself, I wanted something made from acetate filled with Christmas M&Ms. These little boxes are made using the Petal Card Extra-Large Double punch, the unique thing about this punch is that it not only cuts out but scores the card stock at the same time.  It goes perfectly with the Cute by the Inch set, but here I have used them to make a top and base for each tube.  A small strip of Jolly Holiday DSP has the double task of creating a delicate trim and a way to secure the top and base.  The bottom is adhered with 4 glue dots, the piece of ribbon goes through the bottom of the box, up through its middle and out the top.  To get the lollies out just slide the lid up the ribbon! 

These cone decorations are also something I designed myself, almost by accident!  They are made from the Scallop Circle Die for the Big Shot.  I thought they would make great ornaments and then when I saw the numbers stickers in the Simply Scrappin' Kit I knew they would make great advent ornaments!  Made from Jolly Holiday DSP (left) or card stock highlighted with Shimmer Paint (right), and filled with little bags of Christmas M&Ms they make a perfect Advent treat.


This little one I made following the directions by Becky Roberts as part of her 12 days of Christmas tutorial.  Hers were slightly smaller as she lives in America and has different sized chocolates!  I re-sized these to holy one of my favourites snack size bars - Snickers.  The Snickers I then wrapped in matching DSP (this one from Simply Scrappin' Kit), again these would make great Advent decorations.

I hope you have enjoyed my creations, I certainly enjoyed making them, and will be making more in the lead up to Christmas.  Now off to see some more wonderful creations, so hop on over to Julie Fette's blog and see what Christmas treats she has in store.

If you get "lost" here is a full list of the blogs involved in this hop.

Sunday, October 10, 2010

JAI Colour Challenge 38

Well I did it again, did some more challenges this weekend.  This one is for the JAI challenge which honours the Cancer Council's national Pink Ribbon Day on 25th October. "One in every nine Australian women will be diagnosed with breast cancer by the age of 85. It could be a mother, sister, aunt, cousin, niece or friend. Whoever they are, one thing they have in common is that they will need our help and support... Pink Ribbon Day is your chance to help raise money and awareness for all Australian women affected by breast cancer."

So this week's challenge was to add Pink and Bling to a card.  I didn't struggle as much this week as last week, but pink is not normally my colour so it wasn't a walk in the park either.  I chose to use Blushing Bride, one of the new In-Colours. I like it as its a dusky pink rather than a girly girly pink!  I paired this with
Rich Razzleberry and Pear Pizazz and Old Olive.

I wanted to try something new as well so picked the small little roses I have seen on a number of cards, blissfully one had a link to Andrea's web site where she has been kind enough to include instructions.  I think they went well for a first attempt.

To add the bling I decided to apply some of my mix of Crystal Effects and Dazzling Diamonds, I think I perhaps went a bit heavy handed, but overall was happy with the way the card turned out. 

Saturday, October 2, 2010

Just Add Ink Challenge #37

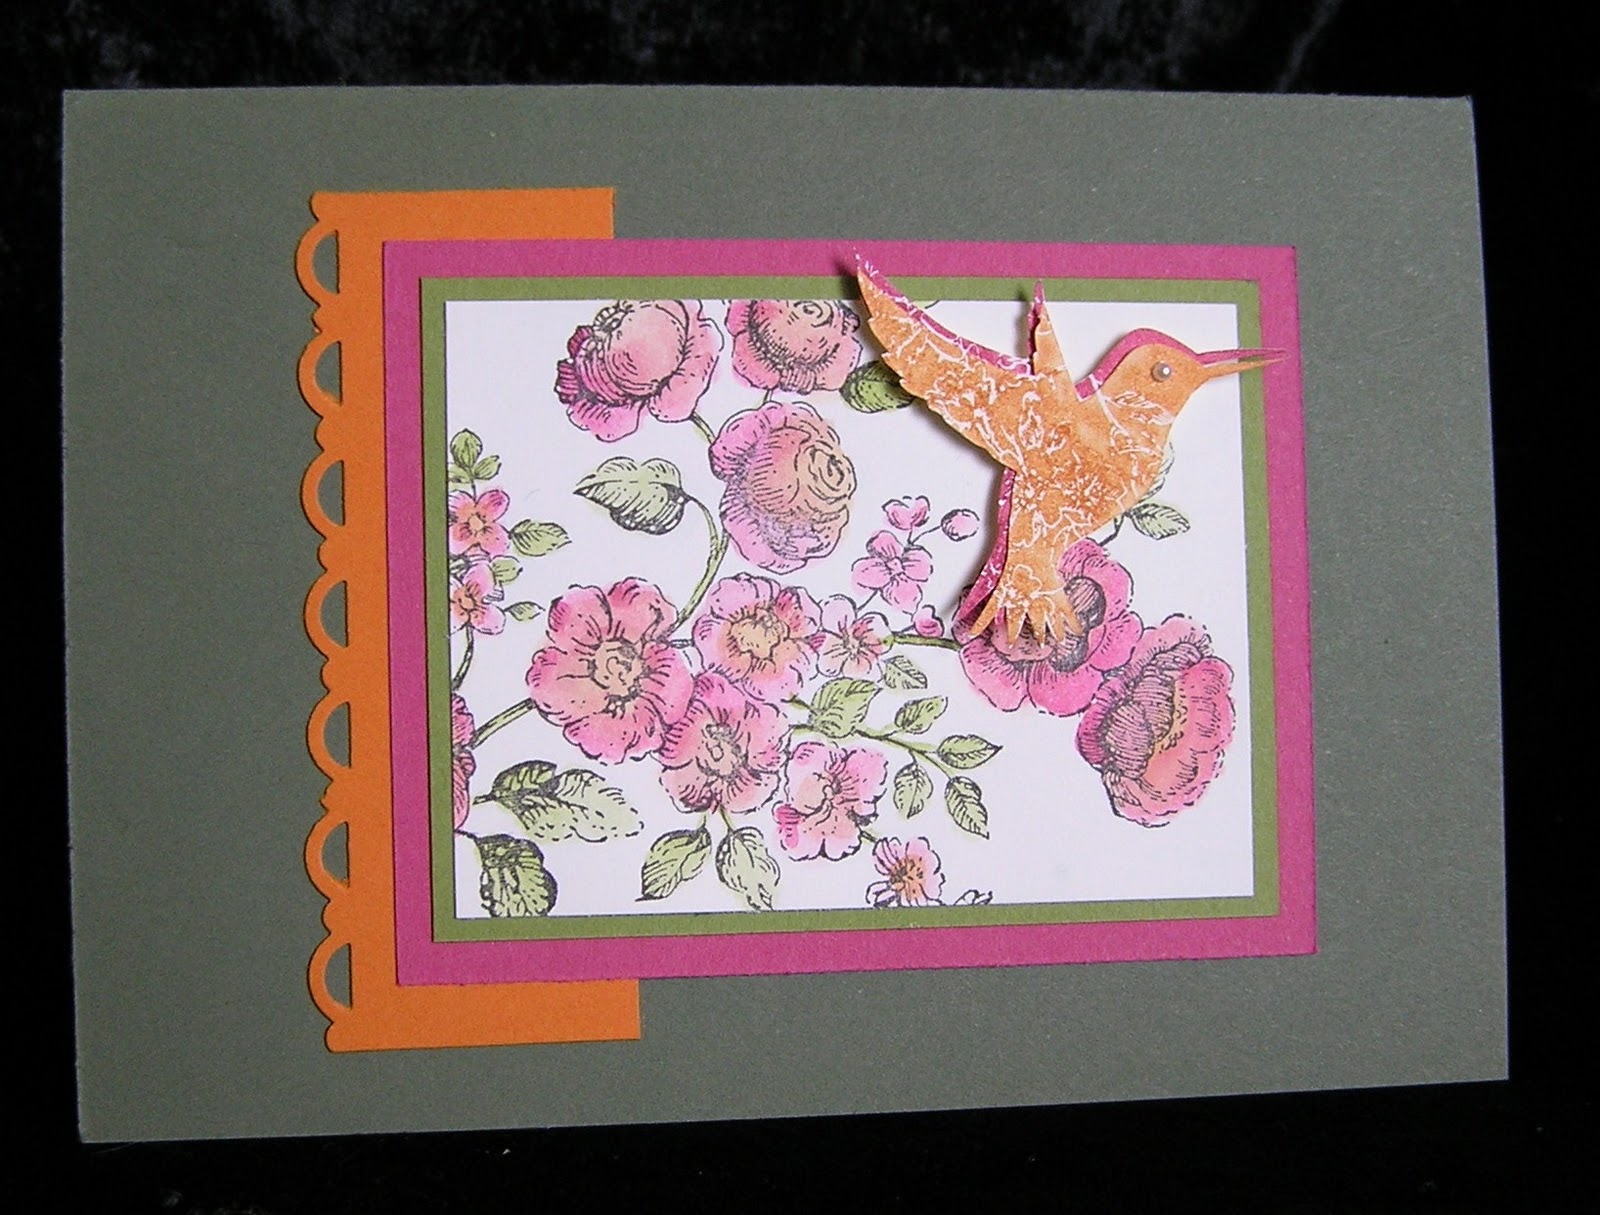
I have decided that I need to challenge myself a bit more, and one of the ways I have decided to do this is to join in challenges set by other websites.  The first one I chose was Just Add Ink colour challenge 37.  For this challenge the four colours I had to use on the card were - Rose Red, Old Olive, Pumpkin Pie and Always Artichoke.
When I first looked at this challenge I thought that I wouldn't be able to join in, as I only own Old Olive in a Classic Stampin' Pad, but when I shuffled through my Stampin' Write Markers I found I also had Rose Red and Pumpkin Pie.  So lack of colours was no excuse not to join in. 
While I decided what to do I decided to get a piece of off-cut card stock in each colour and just lay them on my desk shuffling them around until inspiration struck.  Here is my resulting card, which interestingly enough has 3 of the pieces of off-cuts on it lol ...
I was happy to be able to use my new stamp set Elements of Style, as well as my new Scallop Border Trim Punch which I love to bits. While these are not colours I would normally put together, I was happy with the result, and felt suitably challenged by it!